Admin Panel — How-To Guide
A quick walkthrough of the screens you'll use most often.
0 Your First Login
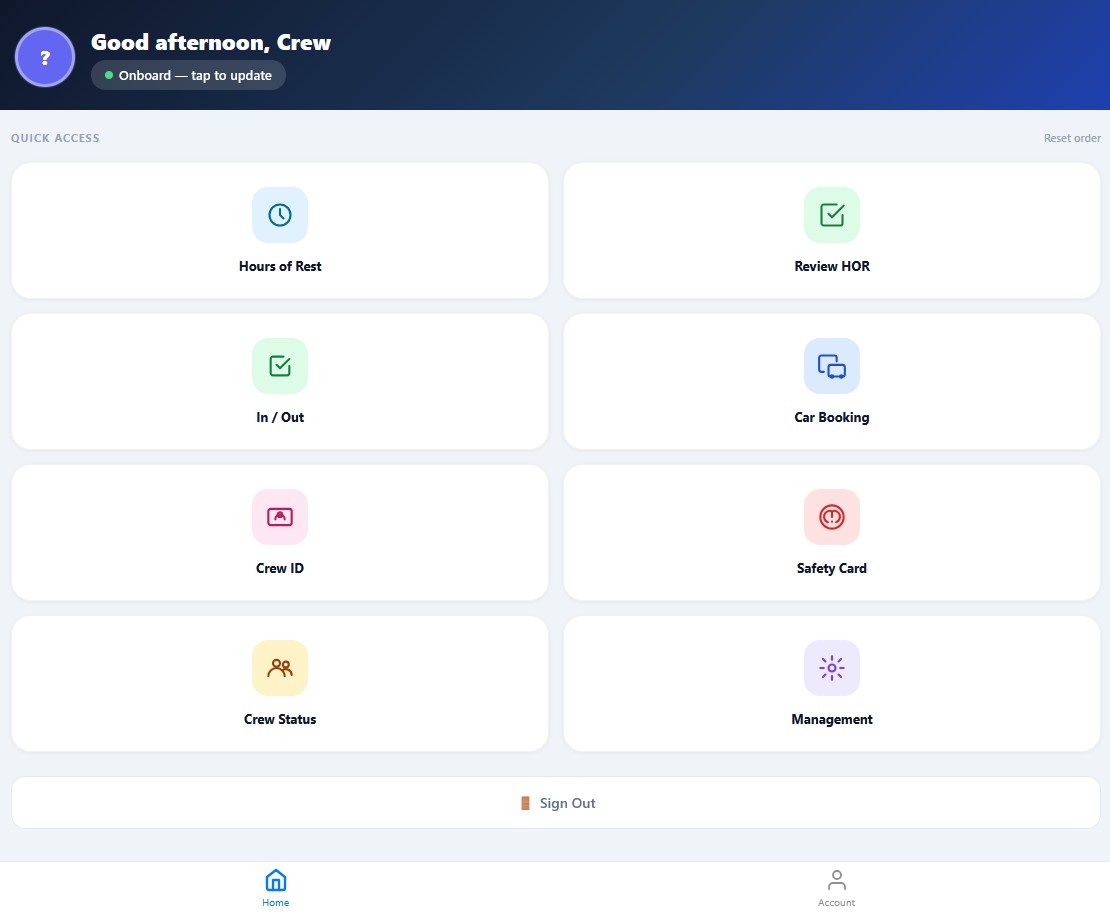
When you log in for the first time, you'll land on the Crew Portal — not the Admin Panel. This is intentional: every user, whether crew or admin, starts here. From this screen you can reach everything you have access to.
Getting to the Admin Panel
If you have admin privileges, you'll see a Management tile on this screen (bottom right in the screenshot above). Tap it to open the Admin Panel.
The tiles around it are the day-to-day tools every user sees — these work on any device:
- Hours of Rest — log your own rest hours
- Review HOR — review and sign rest sheets (department heads and above)
- In / Out — mark yourself onboard or ashore
- Car Booking — reserve a vehicle
- Crew ID — view your ID card
- Safety Card — your muster station and emergency duties
- Crew Status — see who's onboard and who's ashore
- Management — Admin Panel (admins only, desktop only)
What you'll see depends on your role and device
The portal hides tiles you don't have access to. A regular crew member won't see Management; a department head may see Review HOR while others don't. The Management tile is also hidden on mobile devices regardless of role. If a tile is missing that you think should be there, contact your admin or the Quarterdeck team.
Returning to the portal from the admin panel
To get back to the Crew Portal from the Admin Panel, click Crew Portal in the sidebar (near the bottom, just above Sign Out).
1 The Admin Home
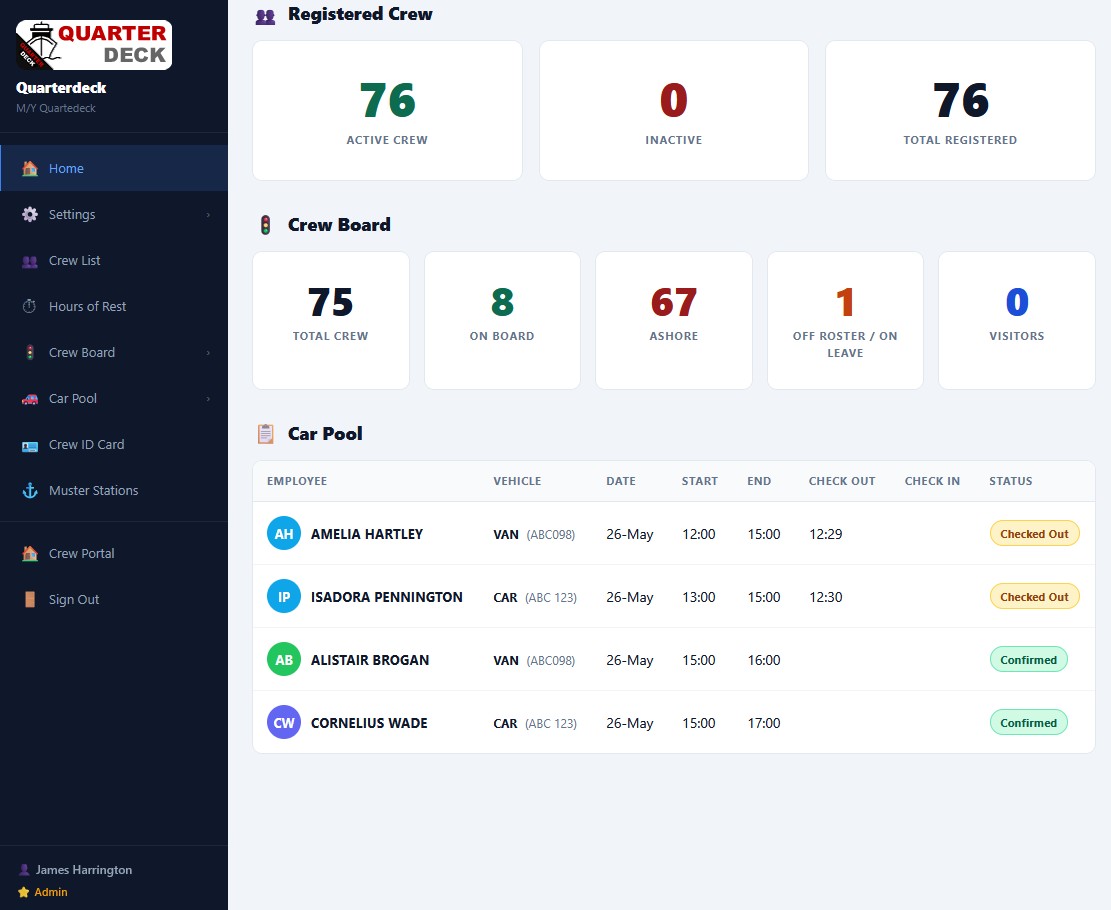
Once you've tapped Management, you'll land on the Admin Home. This screen gives you a one-glance summary of your vessel. Three things sit on this page:
Registered Crew
The top row of cards shows the full crew count for your vessel:
Crew Board
The middle row shows where your crew is right now, pulled live from the Crew Board component:
- Total Crew — everyone on the active roster
- On Board — crew currently aboard the vessel
- Ashore — crew on leave or off rotation
- Off Roster / On Leave — crew temporarily unavailable
- Visitors — non-crew personnel currently on the vessel
Car Pool
The bottom panel shows any active or upcoming car bookings — vehicle, dates, times, and check-in/check-out status. Useful for seeing at a glance whether the vehicles are about to leave or whether anyone is overdue back.
2 Vessel Settings
The first thing to set up on a new installation. Open Settings → Vessel Details from the sidebar.
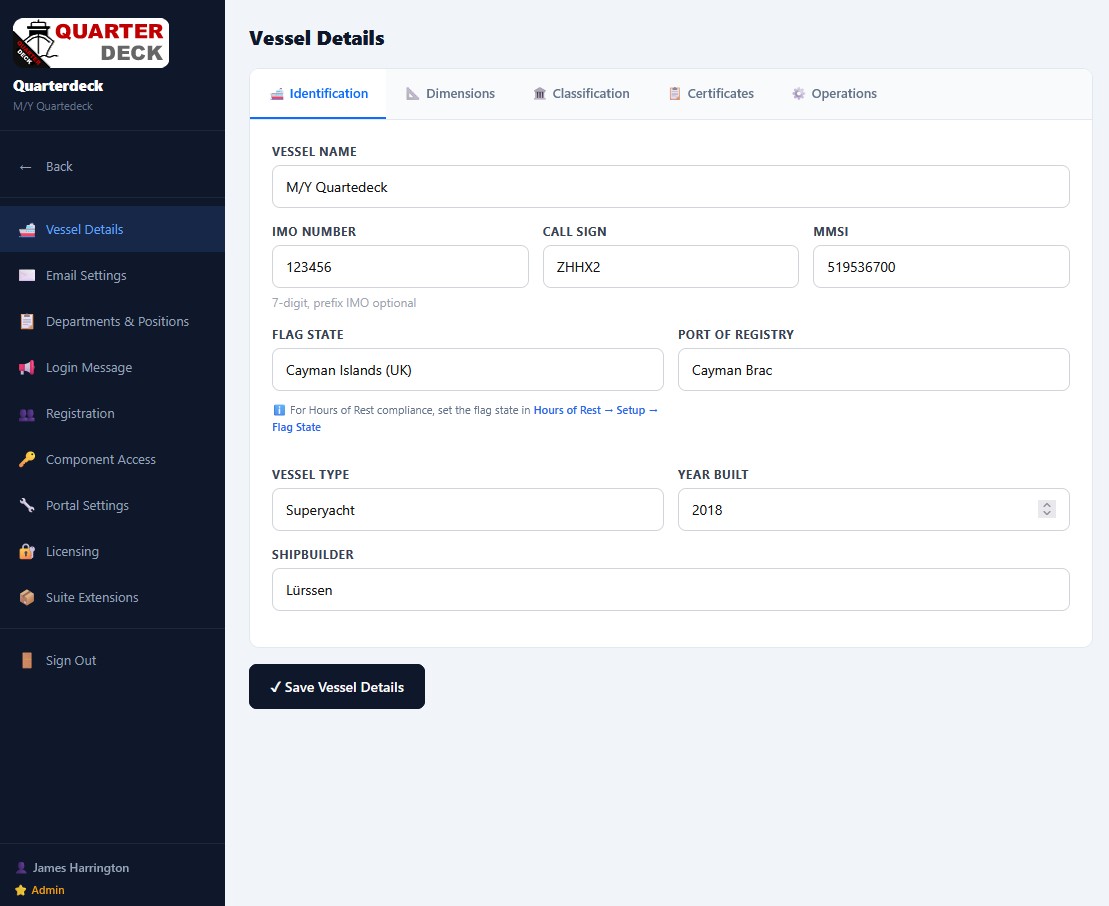
Vessel Details is split into five tabs:
- Identification — name, IMO number, call sign, MMSI, flag state, port of registry, vessel type, year built, and shipbuilder
- Dimensions — length, beam, draft, tonnage
- Classification — class society, notations, hull number
- Certificates — MLC, SMC, DOC, ISPS, and other compliance certificates with expiry dates
- Operations — vessel-specific operational settings
Saving changes
Click the ✓ Save Vessel Details button at the bottom of the page after editing any field. Quarterdeck does not auto-save, so unsaved changes will be lost if you navigate away.
3 Crew List — Managing Your Crew
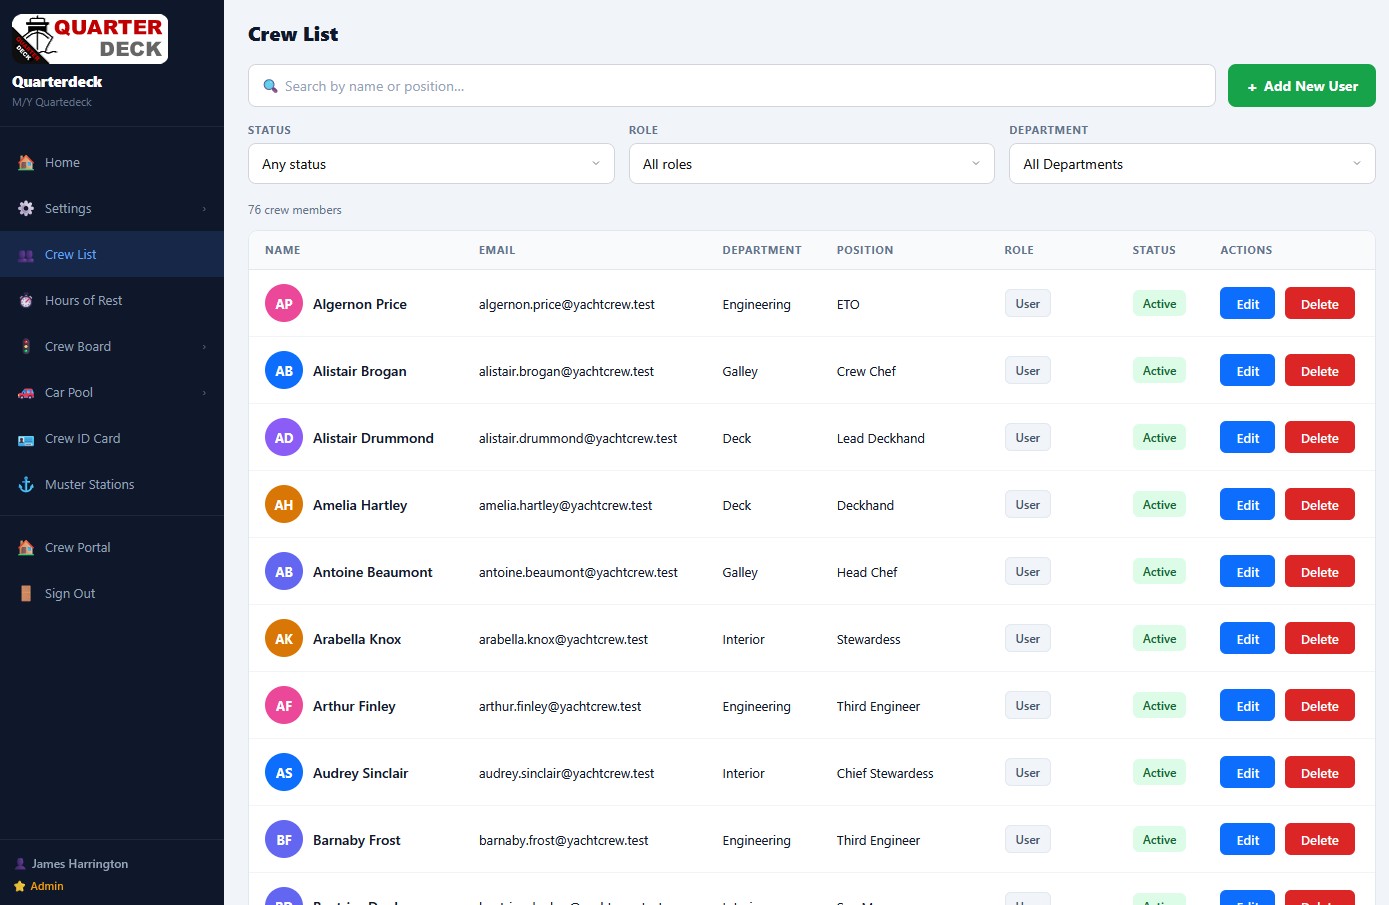
Open Crew List from the sidebar. This is where you add, edit, and remove crew records. Every other tool in the suite reads from this list.
Finding crew
Three controls help you find specific crew members quickly:
- Search box — type a name or position
- Status filter — Active, Inactive, or any status
- Role filter — User, Admin, Department Head, etc.
- Department filter — Deck, Engineering, Interior, Galley, etc.
Adding a new crew member
Click the green + Add New User button in the top right. You'll be asked for:
- Name and email address
- Department and position
- Role (controls what they can see in the suite)
- Initial status (usually Active)
Once saved, the new crew member appears immediately in:
- Hours of Rest (ready to log rest)
- Crew Board (set to ashore by default until they join)
- Car Pool (eligible to book vehicles)
- ID Card Builder (ready for a card to be issued)
- Muster Roster (ready for station assignment)
Editing or removing crew
Use the blue Edit button next to a crew member's row to update their details. Use the red Delete button to remove them — note that this archives them as Inactive rather than permanently deleting their historical records (rest hour logs, muster assignments, etc.).
4 The Sidebar — Quick Reference
The left sidebar is your navigation hub. Items grouped logically:
Operations
- Home — the dashboard you saw in Step 1
- Crew List — covered in Step 3
- Hours of Rest — open the HoR component
- Crew Board — current onboard/ashore status
- Car Pool — vehicle bookings and history
- Crew ID Card — issue and reprint crew IDs
- Muster Stations — manage the station bill
Configuration
- Settings — vessel details, email, departments, login messages, registration, component access, portal settings, licensing, and suite extensions
- Crew Portal — return to the crew-facing portal
- Sign Out — end your admin session